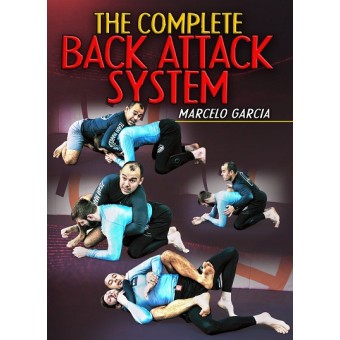
See the step-by-step process Marcelo Garcia uses for getting to the back, getting his hooks in, attacking the choke, and finishing the fight
Marcelo is a 9-time World Champion and known for getting to the back and finishing with the rear naked choke, even against much bigger opponents
This four-part system covers taking the back, jumping back takes, maintaining back control, and finishing from the back
Learn how to use these signature Marcelo attacks, like the rear naked choke, crucifix, and rolling back take
Part 1:
TAKING THE BACK
"Spinning" BACK-TAKE vs Single-Leg Escape, SEAT-BELT w/ Near-Side Tilt or Barrel-Roll
Near-Side BACK-TAKE vs Single-Leg Escape, "Go-Behind" BACK-TAKE, "Spinning" BACK-TAKE from Side Control
"Go-Behind" BACK-TAKE from Sprawl, SEAT-BELT w/ CRUCIFIX or BACK MOUNT
Modified Scarf-Hold from "Go-Behind" BACK-TAKE vs Turtle Escape, Modified Scarf-Hold from Sprawl vs Guard Recovery
"Throw-By" BACK-TAKE from Sprawl, Modified Scarf-Hold vs Turtle Escape
"Go-Behind" BACK-TAKE from Sprawl, Sprawl w/ SEAT-BELT vs Single-Leg Counter to "Go-Behind"
Sprawl w/ SEAT-BELT from "Go-Behind" BACK-TAKE vs Single-Leg, Back-Roll w/ SEAT-BELT vs Single-Leg Reversal
"Go-Behind" BACK-TAKE w/ "Wrist-Rip" from Sprawl vs Turtle Defense, Modified Scarf-Hold w/ "Wrist-Rip" vs Turtle Escape
Standing Closed Guard Break, Leg-Lock Escape, BACK-TAKE w/ Stacking Pass vs Inverted Guard
Rolling Toe-Hold Escape, "Climbing" BACK-TAKE vs Rolling Toe-Hold
Part 2:
JUMPING BACK-TAKES
"Kuzushi" vs All-Fours, "Jumping" BACK-TAKE vs All-Fours, Rolling Leg-Lock Escape
"Kuzushi" from BACK BODYLOCK, Front Head-Lock & Turtle Guard for BACK-TAKE or REAR NAKED CHOKE
"Kuzushi" from BACK BODYLOCK, "Jumping" BACK-TAKE w/ SEAT-BELT, "Jumping" BACK-TAKE vs Quad-Pod or Standing
BACK-TAKE from BACK BODYLOCK vs All-Fours, CRUCIFIX or Near-Side Tilt w/ SEAT-BELT, "Barrel-Roll" vs Turtle Escape
BACK-TAKE from BACK BODYLOCK vs Turtle, "Barrel-Roll" & "Belly-Down" BACK RECOVERY vs Turtle/Back Escapes
"Jumping" BACK-TAKE, Arm-Trap(s), "Re-Jump" vs Hook-Defense
"Jumping" BACK-TAKE, Arm-Trap(s), 2x Cross-Wrist, "Jumping" BACK-TAKE & REAR NAKED CHOKE w/ CRUCIFIX vs Quad-Pod
"Jumping" BACK-TAKE vs Quad-Pod, Near-Side Tilt w/ SEAT-BELT Control vs Quad-Pod
"Jumping" BACK-TAKE & CRUCIFIX vs Quad-Pod, Near-Side Tilt w/ SEAT-BELT, "One-Armed" REAR CHOKE w/ CRUCIFIX
"Jumping" BACK-TAKE w/ SEAT-BELT vs Standing & All-Fours, "Giant-Slayer" BACK-TAKE vs Standing
"Giant-Slayer" BACK-TAKE vs Standing, SEAT-BELT Control w/ BACK MOUNT
"Bolo" BACK-TAKE from Cross-Guard, BACK BODYLOCK from CRAB-RIDE, "Diving" BACK-TAKE from CRAB-RIDE
Part 3:
FINISHING FROM THE BACK
"Swing-Up" BACK RECOVERY w/ SEAT-BELT Control vs Turtle Defense
"Swing-Up" BACK RECOVERY w/ SEAT-BELT Control vs Turtle Escape, REAR NAKED CHOKE vs Turtle Escape
BACK MOUNT, Arm-Trap, "Swing-Up" BACK RECOVERY, Near-Side Tilt vs Turtle, "PEZ" Set-Up for REAR NAKED CHOKE
Double Wrist Control from SEAT-BELT, REAR NAKED CHOKE w/ "Wrist-Wriggle, Crimp-Grip & Scrapes" vs Choke Defense
"One-Handed" Finish for REAR NAKED CHOKE w/ "Crimp-Grip", REAR NAKED CHOKE w/ "Recline" Finish
Arm-Trap, Double Wrist Control, "Kimura-Grip" SEAT-BELT, "PEZ" Set-Up for REAR NAKED CHOKE w/ "Recline" Finish
Arm-Trap, Double Cross-Wrist Control, "Wrist-Wriggle" & "PEZ" Set-Up for REAR NAKED CHOKE w/ "Gable-Grip"
Arm-Trap, 2x Cross-Wrist, "Wrist-Wriggle" & "PEZ" Set-Up for REAR NAKED CHOKE w/ "Gable-Grip", "Jumping" BACK-TAKE
Arm-Drag to Sit-Out Single-Leg Take-Down, Arm-Drag to BACK-TAKE vs Quad-Pod, Near-Side Tilt w/ SEAT-BELT Control
Single-Leg w/ "Run-the-Pipe" Finish, "Kuzushi" from BACK BODYLOCK w/ Single-Leg, "Jumping" BACK-TAKE w/ SEAT-BELT
Single-Leg & "Back-Door" Finish from Butterfly w/ 2-On-1, "Jumping" BACK-TAKE w/ SEAT-BELT from "Back-Door" Single-Leg
Part 4:
MAINTAINING BACK CONTROL
"Barrel-Roll" BACK RECOVERY vs Turtle/Back Escapes, "Reverse Back-Hook" vs Back Escape
"Bridge-Over" w/ SEAT-BELT vs Turtle Escape, "Barrel-Roll" vs Turtle Escape, CRUCIFIX w/ SEAT-BELT Control
"Belly-Down & Cart-Wheel" w/ "Crimp-Grip" vs Back Escape to BACK RECOVERY or REAR NAKED CHOKE w/ "Recline" Finish
"Faze-Through" w/ SEAT-BELT & "Crimp-Grip & Scrapes" vs Back/Choke Defense, REAR NAKED CHOKE w/ "Recline" Finish
"Faze-Through" w/ SEAT-BELT vs Back Defense, Double Wrist Control or Double Cross-Wrist to SEAT-BELT Control
"Faze-Through" w/ SEAT-BELT vs Back Defense, "2-On-1" SEAT-BELT & "Power-Half" BACK RECOVERY vs Back Escape
"Faze-Through" w/ SEAT-BELT vs Back Defense, "Wrist-Rip" vs Choke Defense, REAR NAKED CHOKE vs Back Escape
"Barrel-Roll" vs Back Escape, "Faze-Through", "Crimp-Grip" & "1-On-1" Wrist Control w/ SEAT-BELT vs Back Defense
CRUCIFIX vs Quad-Pod, Mounted CRUCIFIX vs "Slide-Out" Escape, Inverted Triangle from Mounted CRUCIFIX
Standing Closed Guard Break
Kualitas HD 720p
Format file MP4
durasi 7 jam 07 menit
Rilis juni 2020
Detil lihat dipreview
File sudah online,bisa langsung download tanpa harus kirim DVD
Digital video is available for immediate downloading
The Complete Back Attack System by Marcelo Garcia
- Product Code: bjj806
- Availability: In Stock
-
Rp.350,000


